| 1. from Digital data to Film photo
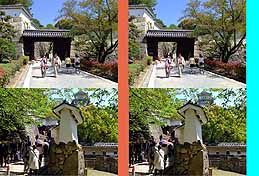 Viewmaster format is smaller than a quarter of conventional 35mm film size, therefore it's possible to put two sets of viewmaster pairs (4 photos) in one frame of 35mm film. Create four photo set data like the sample with any image editing software (such as Photoshop). Then expose the digital data to reversal film with Film-recorder. Viewmaster format is smaller than a quarter of conventional 35mm film size, therefore it's possible to put two sets of viewmaster pairs (4 photos) in one frame of 35mm film. Create four photo set data like the sample with any image editing software (such as Photoshop). Then expose the digital data to reversal film with Film-recorder.
You would be able to get Film-recorder on internet auctions with reasonable price, because many machines are discarded nowadays in the trend of digital dysplay. (I recommend 7inch CRT machine)
Of course, the machine alone without driver software is imperfect. It's another matter to get the driver.
2. Cut out the Viewmaster reel pattern
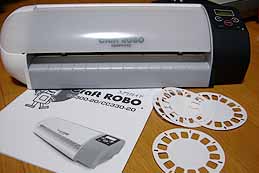 Previously I cut out the reel pattern by my own hands. It was a very hard work, as you could imagine. But this time, powerful instrument is available. It is the "cutting plotter". Previously I cut out the reel pattern by my own hands. It was a very hard work, as you could imagine. But this time, powerful instrument is available. It is the "cutting plotter".
I have bought a "Craft robo", that will cut out 6 sets of viewmaster reel pattern from A3 size paper. With this, a small modification is possible. I have made a little wider window of 13.0width x 10.5height (mm) than the original size of 11.5 x 10.5
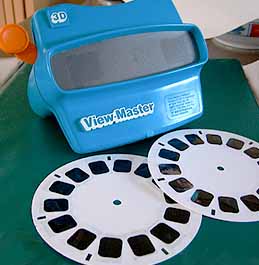
3. Make up the viewing reel
prepare the followings
1) slide film made as described in "1"
2) two types of viewmaster reel pattern, made of Kent paler or like that, and of labeling paper.
3) other tools; small plastic ruler, scissor, thin adhesive tape, paper clip and tweezers (pincet).
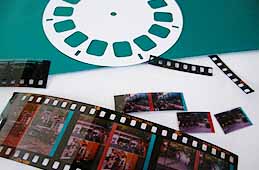 Cut out the film to separate each viewmaster photo. The bottom and left line should be as accurate as possible, because we line the photos along the upper edge of the ruler, and adjust the 6.5cm interval guided by the edge of the photos.
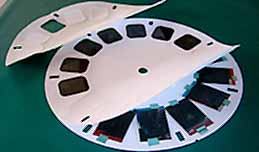
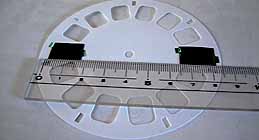 Set the ruler 1-2mm below the viewmaster window frame. Place the photos along the upper edge of the ruler and adjust the interval. And fix them by small piece of adhesive tape.
 Turn right for the next scene (skip one window hole), and attach the next pair.
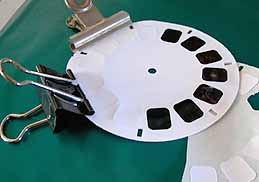 After you have attached all the photos, pile up the labeling paper as all the guiding holes fit perfectly each other, and fasten half with clips. Then peel off the backing of free half of the labeling paper and paste.
 Peel off the backing of remaining half and paste, that's finished.
 It may be slightly thinner than the reel on the market. If the locomotive mechanism doesn't work, it would be a help to put another labeling paper.
|